Showing posts with label Texture. Show all posts

Thursday, April 9, 2015

Spring Sculpures

In case you didn't know, I love working with clay, and have yet to meet a student who doesn't! Having had Easter and Spring just around the corner I felt a clay project was in order. The younger grades focused on texture, patterns, and color in their Easter egg spoon rests.


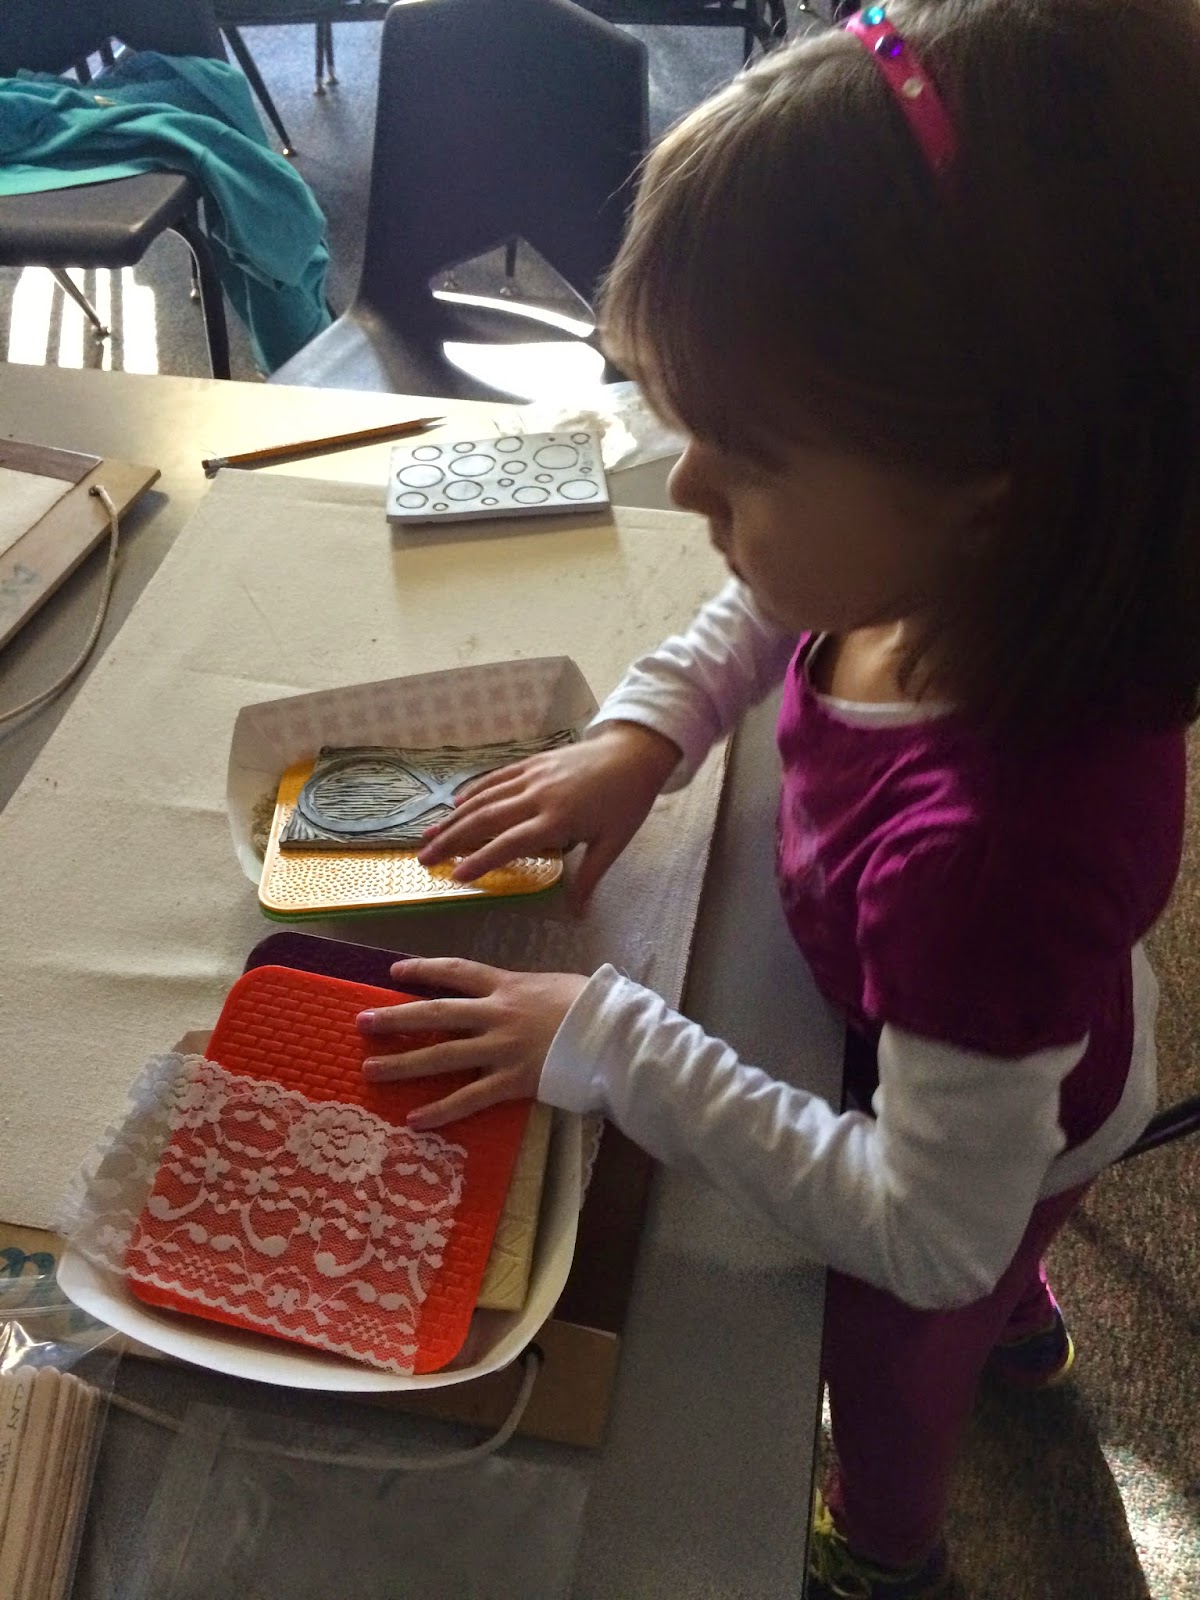
So many fun textures to press into clay!
And here are the finished products!
A few students made flowers and they are beautiful!

Grades 4-5 learned how to "score" their clay to help clay pieces adhere to each other, and focused on a pinch pot/coil union. I have yet to see a birds nest dish that hasn't looked amazing. They ROCKED their coils!


There is something relaxing about rolling coils...


Here, Mayra, Abigail, and Daniel focus intently on getting glaze in every nook and cranny!
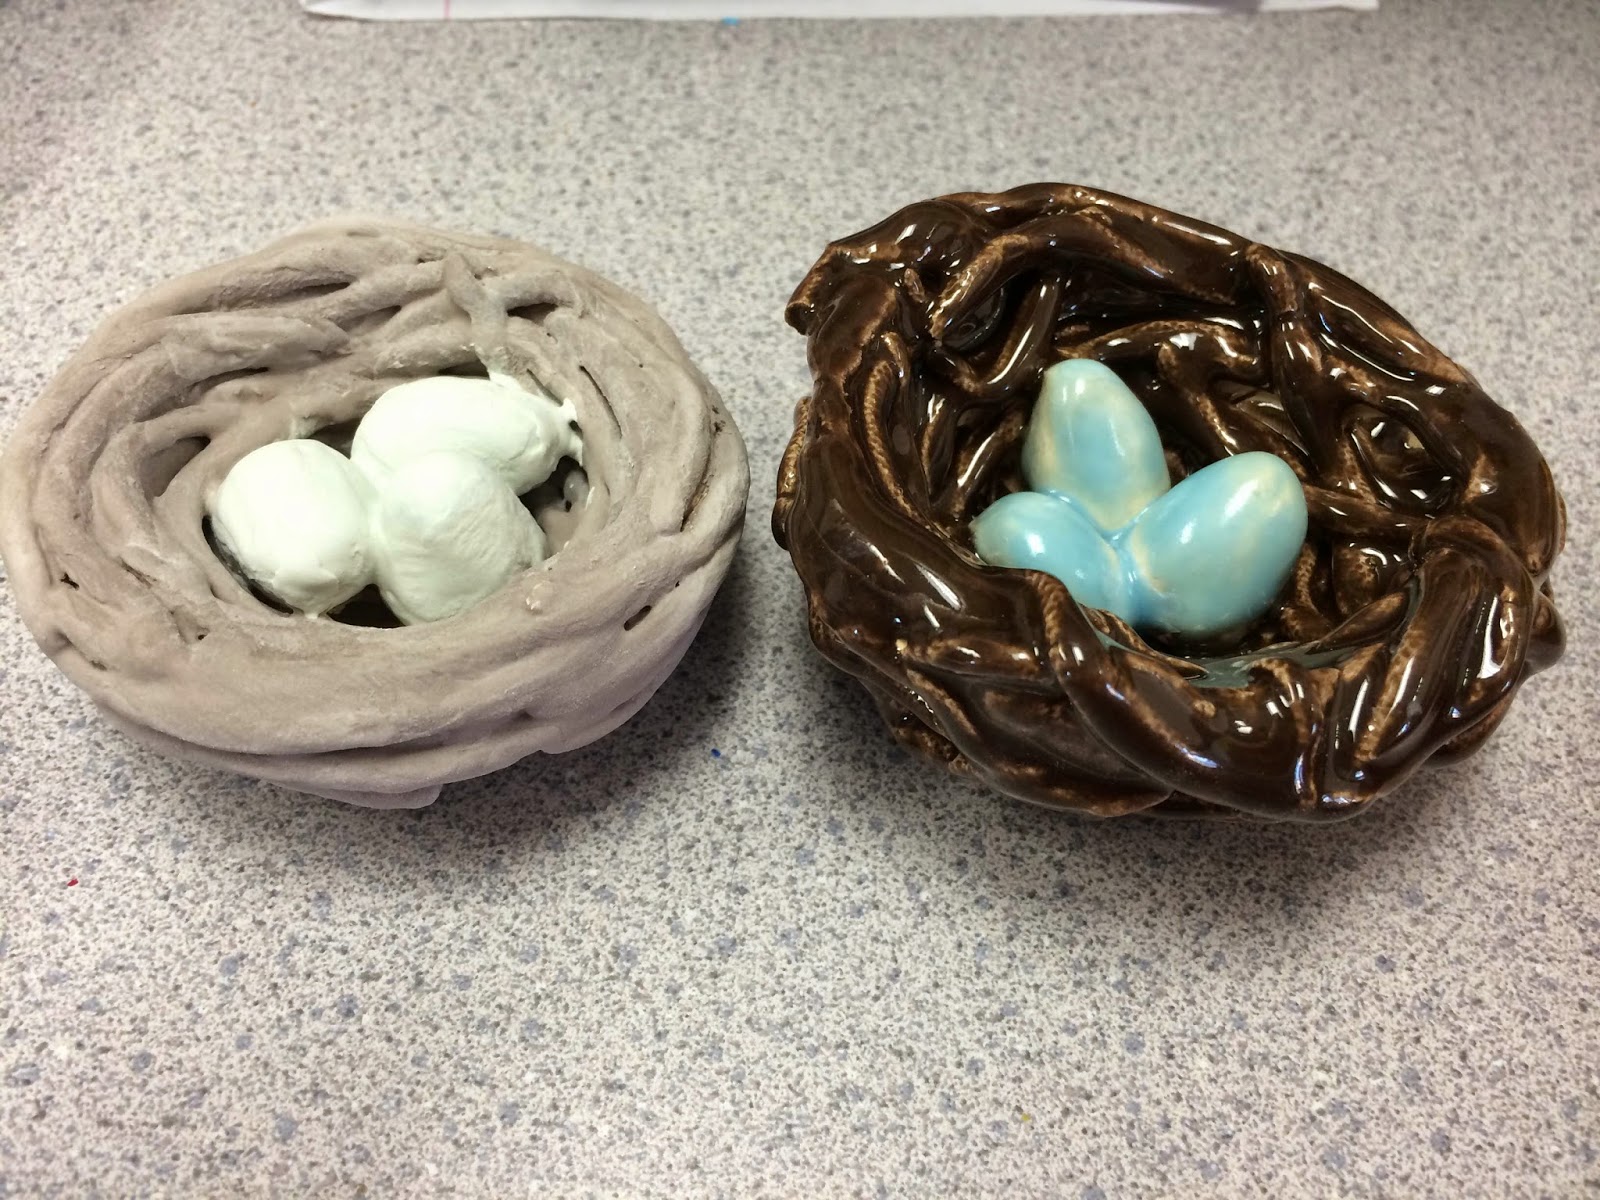
This is kind of a fun comparison of how the colors change before and after the glaze is cooked in the kiln.

So many happy little nests!
It's official-Spring is finally upon us!!!


Saturday, January 17, 2015

Wayne Thiebaud-Texture

Wayne Thiebaud is an artist that implements both implied texture, and actual texture shown with the thick paint he smears on the canvas in his delicious dessert paintings. As our last texture project, we embraced Thiebaud by creating dessert paintings of our own (with VERY thick paint, of course!)

Our Kindergarteners and 1st graders created textured reproductions of Thiebaud's ice cream paintings.
 Below is the example of his artwork I showed the students:

  
They loved squeezing the "hot fudge" on their ice cream cones.

Our grades 2/3 tackled some luscious cupcakes inspired by Thiebaud's thickly painted "Boston Cremes" shown below!


This puff paint was achieved by mixing equal parts glue and shaving cream.

Everyone's cupcakes turned out great!
Our 4th and 5th graders took on a little more of a challenge with a slice of delicious cake using thick actual texture for the icing, and spongey implied texture for the cake.


Perfectly frosted, Alexa!

I love the bright blue, Chayse!

Awesome color contrast, Damian!

These were so fun to do, and for now I think we are VERY clear on how to use the element of Texture in our artwork!


Friday, January 2, 2015

Implied Texture!

 Implied texture is very different from actual texture in the sense that art techniques are used to manipulate a medium to LOOK like a specific texture, but not ACTUALLY FEEL like that texture in real life. This is one art element most commonly used in photorealistic artwork such as the work of painter Doug Bloodworth (shown below.)


Our K-1 class used a fluffy, dry-brush technique to create soft scarves and light, fluffy snow in their winter paintings. We learned how rough lines can create a bumpy feel (like on sticks!) and how even strokes create a smooth feeling (like on a packed snow man.) We also tried the technique of using the opposite end of the paint brush to "dot" nice circles for buttons and stones.


Haha, oh the buttons!


Our grade 2/3 class learned how to manipulate chalks to create a soft glow of light, and how smooth, clean texture with an added white highlight creates the illusion of hard, shiny texture.

I cannot get enough of these!


Our grade 4-5 took on some winter self portraits. Who doesn't love catching snow on their tongues?!

They did a great job of smoothing out their oil pastels, and using curves lines to simulate their fluffy scarves.


I think it's safe to say that our kids have nailed implied texture!


Actual Texture Clay Creations!

In the month of December we have been focusing on the element of Art, Texture. Texture is a very easy element to remember for young students because it can directly integrate one of our most memorable senses: touch. Now, in art there are two types of texture: actual and implied. First we tackled the easiest- actual. And what better way to implement texture than with clay! 

Our K-3 classes created clay ornaments (or dishes if they don't celebrate with Christmas trees) by pressing items into clay. The K-1 class used air dry clay and cookie cutters. Because this clay did not require baking, they were able to press pretty beads into them, which children love!


After they dried, we painted, glittered and varnished them. Chances are by now, they've been hanging on your trees for 2 weeks already! 


Here are some of the 2nd/3rd graders ornaments, all fired and glazed!


Aside from being pretty busy, the main reason I post-poned this post until after Christmas was because I know some of our 4/5th graders were gifting their projects. For them we created a hanging vessel out of clay. After firing in the kiln, the students glazed and wrapped them. These can be used as small vases or pencil holders, or if you can find some really strong magnets, would be great on the fridge!


Chayse's adorable vase!

I liked Daniel's classic choice of solid Red, and what great texture!


I also loved seeing them all together. It never amazes me how versatile the results of one one projects. Our students are so creative!